Monday, October 26, 2020

Terraform tricks : How to mimic nested variable substitution using locals

Intro

This image has an empty alt attribute; its file name is terrafom_dilema.png

                         “Developer’s constant urge to use Terraform like a programming language :)”

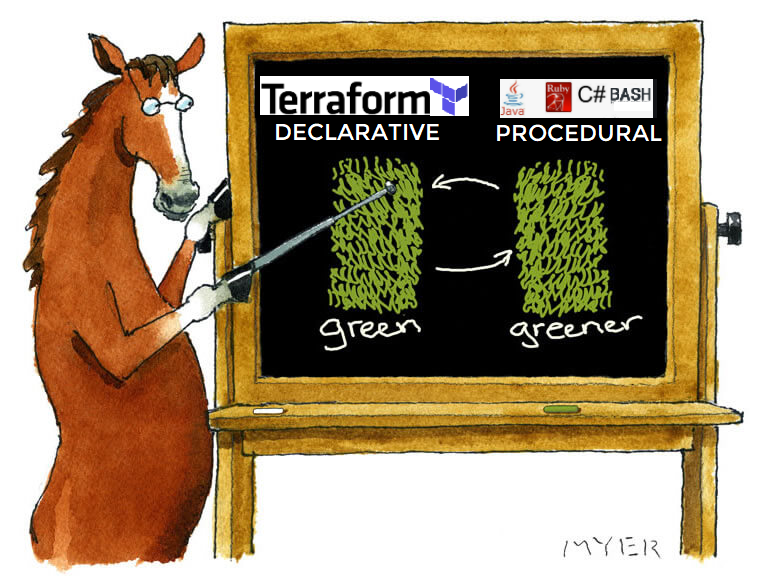
My impression after enjoying my first terraform applys is that it's kind of rigid, though when someone says Immutable and declarative in the same sentence, you should definitely get that it's not procedural by design. Therefore,  you can’t expect a bash shell script programmability. That's the tricky part for me because I always start playing with the Cloud vendor’s CLI before switching to its Terraform provider... It’s like having a BBQ party on Sunday then turn vegan on Monday :D!! You  just wish they could allow a tiny more.

Most of the time, the code inside your terraform configuration is pretty static, more like a reflection of the actual end state (hard coded).  In a sense, declarative language is more readable but don’t fit the “if then else” logic proper to procedural programing (single use scripts).That being said, terraform still provides a number of functions and expressions you can use to process strings/number/lists/maps/simple loops etc.
                               
                                    -- “Because we’ll always have that reflex to make our code conditional.” --

What If, I wanted my aws vpc configuration (see config in my GitHubRepo) to  accept different  security group rules  depending on the type of instance attached ? It’ll probably reduce duplication and improve reusability.
This article answers just that as it will demonstrate how  dynamic interpolation of a nested variable can be accepted by the parser and used by a for_each loop to make a terraform provisioning more flexible. I’ll explain better through the post (don’t worry).

Terraform available loops

As said above, terraform has  few routines and expressions that allow to perform loops, if-statements and other logic.

Conditional loops

1. Count
:
Available in terraform 0.11, count can control the the number of resources to be created or whether the resource will be created at all using the ternary-operator  [CONDITION ? TRUEVAL : FALSEVAL] => IF:THEN:ELSE

variable "instance" {
default = true
}
variable "
instance_NB" { default = 3 }
# Create or Ignore
resource "aws_instance" "bastion" {
count = "${var.instance ? 1 : 0}" # IF var.instance=true THEN creation ELSE code ignored
}
# for 1 to N create instance
resource "aws_instance" "bastion" {
count = var.instance_NB # if var is a list/map you can use length(var)to get the nbr
}

Pros: Perfect for conditional logic using ternary operator (1:create, 0: skip)

weaknesses: Using count inside of an inline block is not supported (i.e Tags) and referencing a count element using its index can be risky and confusing when deleting specific resources. Some users also think this is so 0.11 ;)!
 
2. For_each:
Available since v0.12, this one is more sophisticated than count, as it’s close to the loop as we know it. Below, we loop over all the map’s content to create as many resources as the length of the map (you can try this yourself).

variable "triggerMap"{ 
  default = {
    1 = "cluster_1"
    2 = "cluster_2"
  }
}
# for each map tuple create a resource based on its key and value resource "null_resource" "cluster" { # Changes to any instance of the cluster requires re-provisioning for_each= var.triggerMap triggers = { cluster_node_id = each.key cluster_name = each.value }

Pros: helps create multiple resources or inline blocks by looping over maps, set of strings, lists. Easy to reference an element within the looped collection (name instead of index). It even started to support Modules with version 0.13.

Weaknesses: Conditional logic is more complex than in count as it requires a nested for loop within the for_each clause. Referenced collection has to be computed during the plan phase and not upon resource creation (not on the fly).
   

My pick: The use of for_each is recommended by Hashicorp as it’s more intuitive than count and no longer effected by the order of the variable's values (index). Hence, I will be relying on it in my below use case
 

USE CASE


        “Trying to reduce duplication and maintain readability is the eternal Terraform struggle”

Cool, now let’s describe the reason behind this post in the first place. In my previous vpc configuration (see my GitHubRepo) I hardcoded all the security group rules (Open Ports) which made it un-reusable. The following snippet will illustrate  the section of interest ( ingress rules ):

resource "aws_security_group" "terra_sg" { name = var.sg_name vpc_id = aws_vpc.terra_vpc.id description = "SSH ,HTTP, and HTTPS" egress { cidr_blocks = ["0.0.0.0/0", ... } ingress = [ { cidr_blocks = ["0.0.0.0/0", ] description = "Inbound HTTP access " from_port = 80 protocol = "tcp" to_port = 80 prefix_list_ids = null ipv6_cidr_blocks = null
security_groups = null
self = false },
... ingress = [ Similar Ingress rule for port 22
... ingress = [ Similar Ingress rule for port 443
...
}

Notice that all the ingress rules are added as inline blocks in the main resource “terra_sg”. However, Terraform also provides a standalone Security Group Rule resource (a single ingress or egress rule) . This could really help to make the deployment more dynamic.
So let’s say, we have 3 cases or sets of sg ingress rules per type of attached instance:

  • Case 1:  SSH only => port 22
  • Case 2: SSH+WEB => port 22, 80, 443
  • Case 3: RDP+WEB (Windows)=> ports 3389, 80, 443
How can we use for_each to pick only the list of ports matching the case I choose (1 out of 3)?

Desired configuration

The aim here is to replace the old vpc configuration that had a security group with hard coded inline rules (fixed list of ports) by a dynamic  iteration of an “aws_security_group_rule” resource using a for_each loop. To do so, I first need to create a map for each set of sg rules.

# case 1
    variable "sg_ssh" {
    type = map
    default = {SSH = 22}
   }
# case 2
     variable "sg_web" {
     type = map
     default = {
                SSH = 22
                HTTP = 80
                HTTPS= 443}
   }
# case 3
   variable "sg_win" {
        type = map
        default = {
            RDP = 3389
            HTTP = 80
            HTTPS= 443}
   }       

  • After that, we can add another map which will help identify each security group rule and a variable sg_type to specify which rule we wish to apply upon deployment(bear with me we’re almost there).
  •  # Map of sg rule names 
        variable "sg_mapping" {
          description = "mapping for sg rules "
          default = {
            "SSH" = "sg_ssh",
            "WEB" = "sg_web",
            "WIN" = "sg_win"
          }
        } 
    
    # sg rule selector
     variable "sg_type"{
          default = "WEB" 
          }
    

    Is Nested variable call Possible in Terraform?

    At this point in I only need to make the for_each expression accept a call to a nested variable that would include 3 variables:
    1. sg_type to pick the rule type
    2. sg_mapping to fetch the right map variable based on sg_type
    3. A wrapper variable that the for_each can call =>
              var.[var.sg_mapping[var.sg_type]                                 

    But l quickly realized that terraform doesn’t allow variable substitution within variables as shown below:  

    # terraform Console
    > var.sg_mapping[var.sg_type]
     sg_web
    > lookup(var.sg_mapping, var.sg_type)
     sg_web
    #
    nested var call > var.${var.sg_mapping[var.sg_type]} #OR var.${lookup(var.sg_mapping, var.sg_type)} Error: Invalid character > on line 1: (source code not available).This character isn't used within the language. Error: Invalid Attribute name
    > on line 1: (source code not available).An attribute name is required after a dot.


    Solution

    After few unsuccessful attempts and hours sniffing forums and other resources online. I sensed that I might have neglected a special type of variables that could help dealing with my substitution woes. The potential silver bullet in question is
    terraform local which is a local block where expressions are defined in one or more local variables within a module. I was close but I still needed help from the community on Hashicorp forum.

    The final result to represent my nested variable substitution: var.[var.sg_mapping[var.sg_type] is as follows

     # Locals block 
    locals { sg_mapping = { # variable substitution within a variable SSH = var.sg_ssh WEB = var.sg_web WIN = var.sg_win } } resource "aws_security_group "terra_sg" {...}
    ... resource "aws_security_group_rule" "terra_sg_rule" { for_each = local.sg_mapping[var.sg_type] # => var.[var.sg_mapping[var.sg_type] type = "ingress" from_port = each.value to_port = each.value protocol = "tcp" security_group_id = aws_security_group.terra_sg.id description = each.key cidr_blocks = ["0.0.0.0/0",]

    With Locals, I only needed to move sg_mapping map to a local block and replace its values by each literal sg map variables and voila !  the for_each can now call the local variable which in turn will substitute the sg_type variable.

    Terraform plan
    Each resource will be created and identified according to the selected map value (example “ WEB =>80,443,22”).

    # aws_security_group_rule.terra_sg_rule["HTTP"]:
    resource "aws_security_group_rule" "terra_sg_rule" {
        cidr_blocks       = ["0.0.0.0/0",]
        description       = "HTTP"
        from_port         = 80
    ...
    }
    # aws_security_group_rule.terra_sg_rule["HTTPS"]:
    resource "aws_security_group_rule" "terra_sg_rule" {
        cidr_blocks       = ["0.0.0.0/0",]
        description       = "HTTPS"
        from_port         = 443
    ...
    }
    # aws_security_group_rule.terra_sg_rule["SSH"]:
    resource "aws_security_group_rule" "terra_sg_rule" {
        cidr_blocks       = ["0.0.0.0/0",]
        description       = "SSH"
        from_port         = 22
    ...
    }
    ...
     

        OUTPUT

        When for_each is set, Terraform will identify each of the resource instances associated with the dynamic resource block by a map key from the value provided to for_each. (example : =>  aws_security_group_rule.terra_sg_rule["SSH"])
        Hence, referencing these resources as a list is wrong  [aws_security_group_rule.terra_sg_rule.* ] => error

        The correct way to output all of our resource instances in my case is to use a for loop to traverse and fetch the resulted map.

        # Terraform control
        > { for sg,p in aws_security_group_rule.terra_sg_rule : sg => p.to_port} { "HTTP" = "80" "HTTPS" = "443" "SSH" = "22" }


           CONCLUSION

        • This was an improvement I wanted to complete from my previous blog post, but I hope you enjoyed discovering (like me) how to leverage dynamic features to increase the reusability of a terraform module
        • Locals are a solid ally when dealing with variable substitutions within a variable (nested variables)
        • Obviously, the over-use of dynamic behavior will hurt readability and maintainability. As terraform team likes to remind us often its famous mantra: Explicit is better than implicit, and direct is better than indirect”
        • TIP : There is also a way to keep all the maps in one main map and then create a local variable that would reference the sub map directly instead of calling an individual map each time .
        • # all cases in one map variable "main_sg" { default = { sg_ssh = {SSH = 22},
          sg_web {
          SSH = 22
          HTTP = 80
          HTTPS = 443 },
          sg_win {
          RDP = 3389
          HTTP = 80
          HTTPS = 443 }
          }

          }

          # Locals block
          locals { sg_mapping = { # variable substitution within a variable SSH = var.main_sg.sg_ssh WEB = var.main_sg.sg_web WIN = var.main_sg.sg_win } }
          ... resource "aws_security_group_rule" "terra_sg_rule" { for_each = local.sg_mapping[var.sg_type] …
        • It might comfort you to know that balancing the readability and reusability is everybody’s struggle with Terraform ;)
           

        Reference:
        cloudaffaire.com
        blog.gruntwork.io
        GitHubRepo for this lab: brokedba/terraform-examples/terraform-provider-aws/create-vpc-dynamic

        Sunday, October 18, 2020

        Terraform for dummies part 2: Launch an instance with a static website on AWS

        Intro

        This has become a habit so far to explore different ways of automated provisioning for each cloud provider. This time, I will try Terraform on AWS and reproduce the same deployment I have completed on Oracle Cloud, and as usual we won’t just deploy an instance but also configure a website linked to its public IP. I’ll end this post with some notes on OCI/AWS differences.
         
        Note: I have done a similar task with my bash scripts and AWSCLI  which was very helpful to understand the logic behind each IAC interaction during the resource creation (More details >here).

        Here’s a direct link to my GitHub repo linked to this lab =>: terraform-examples/terraform-provider-aws

        Content :
        I. Terraform setup
        IV. Partial deployment
         V. Full deployment
        Tips  & Conclusion

        Overview and Concepts

        Topology

        The following illustration shows the layers involved between your workstation an Oracle cloud infrastructure while running the terraform commands along with the instance attributes we will be provisioning.

        Besides describing my GitHub repo before starting this tutorial, I’ll just briefly discuss some principles.

      • Infrastructure As Code Manages and provisions cloud resources using a declarative code (i.e Terraform)  and definition files avoiding interactive configuration. Terraform is an immutable Orchestrator that creates and deletes all resources in the proper sequence. Each Cloud vendor has what we call a provider that terraform uses in order to convert declarative texts into API calls reaching the Cloud infrastructure layer.


      • Terraform Files
      • - Can be a single file or split into multiple tf or tf.json files, any other file extension is ignored.
        - Files are merged in alphabetical order but resource definition order doesn't matter (subfolders are not read).
        - Common configurations have 3 type of tf files and a statefile.
          1- main.tf: terraform declaration code (configuration) . The file name can be anything you choose       
          2- variables.tf: Resource variables needed for the deploy
          3- outputs.tf: displays the resources detail at the end of the deploy
          4- terraform.tfstate: keeps track of the state of the stack(resources) after each terraform apply run

      • Terraform resource declaration syntax looks like this:
      • Component "Provider_Resource_type" "MyResource_Name" { Attribute1 = value .. 
                                                               Attribute2 = value ..}

      • Where do I find a good AWS deployment sample?
      • The easiest way is to create/locate an instance from the console and then use the import function from terraform to generate each of the related components in HCL format (vpc,instance,subnet,etc..) based on their id.

        Example for a VPC >>
        1-  Create a shell resource declaration for the vpc ina  file called vpc.tf 
        2-  Get the id of the vpc resource from your AWS Console
        3-  Run the Terraform import then run Terraform show to extract the vpc’s full declaration from aws in the same file (vpc.tf)
        4- Now you can remove the id attribute with all non required attributes to create a vpc resource (Do that for each resource) 
        1- # vi vpc.tf 

          provider "aws" {     region = "us-east-1"    }
          resource "aws_vpc" "terra_vpc" {
        }
        2- # terraform import aws_vpc.terra_vpc vpc-0091141e28608813c
        3- # terraform show -no-color > vpc.tf

        Note:
        If you want to import all the existing resources in your account in bulk mode (not one by one) there is a tool called Terraforming, which can import both code and state from your AWS account automatically.

        Terraform lab content: I have deliberately split this lab in 2:

        • VPC Deployment: To grasp the basics of a single resource deployment.
        • Instance Deployment: includes the instance provisioning (with above vpc) with a hosted web sever.


        I.Terraform setup

           Since I’m on windows I  tried the lab using both Gitbash and WSL (Ubuntu) terminal clients (same  applies for Mac).

          Windows: Download and run the installer from their website (32-bit ,64-bit)

          Linux: Download, unzip and move the binary to the local bin directory

          $ wget https://releases.hashicorp.com/terraform/0.12.28/terraform_0.12.28_linux_amd64.zip
          $ unzip terraform_0.12.18_linux_amd64.zip
          $ mv terraform /usr/local/bin/
        • Once installed run the version command to validate your installation

          $ terraform --version
            Terraform v0.12.24
           AWS authentication

          To authenticate with your aws account, Terraform will need to provide both  access_key_id & secret_access_key . This can be done either by sharing the authentication parameters with aws-cli or by Including the access_key and key_id within the Terraform config (i.e. variables.tf)

           Assumptions

          - I will assume that either of the two below authentication options are present/configured in your workstation:
        • AWSCLI default profile configured with your aws credentials (Access keys). Refer to my Blog post for more details
        • $ aws configure list
          Name                    Value            Type    Location
          ----                    ---------        ----    -------- profile                 <not set> None    None
          access_key     ****************J2WA shared-credentials-file
          region                us-east-1      config-file    ~/.aws/config
        • Or AWS credentials imbedded in provider specific config section on one of your terraform files (See vpc.tf)
          provider "aws" {
          # access_key = "${var.aws_access_key}" – uncomment & replace accordingly
          # secret_key = "${var.aws_secret_key}" – uncomment & replace accordingly
          region = var.aws_region --- uncomment and replace accordingly}
        • - I’ll also assume the presence of an ssh key pair to attach to your ec2 instance. If not here is a command to generate a PEM based key pair.  
          $  ssh-keygen -P "" -t rsa -b 2048 -m pem -f ~/id_rsa_aws
          Generating public/private rsa key pair.
          Your identification has been saved in /home/brokedba/id_rsa_aws.
          Your public key has been saved in /home/brokedba/id_rsa_aws.pub.


        II. Clone the repository


        III. Provider setup

        1. INSTALL AND SETUP THE AWS PROVIDER

          • Cd Into the subdirectory terraform-provider-aws/create-vpc where our configuration resides (i.e vpc)
            GitBash $ cd /c/Users/brokedba/aws/terraform-examples/terraform-provider-aws/create-vpc

            ubuntu $ cd /mnt/c/Users/brokedba/aws/terraform-examples/terraform-provider-aws/create-vpc
          • AWS provider plugin is distributed by HashiCorp hence it will be automatically installed by terraform init.
          • $ terraform init
              Initializing the backend...
            
              Initializing provider plugins...
              - Checking for available provider plugins...
              - Downloading plugin for provider "aws" (hashicorp/aws) 3.11.0...
              * provider.aws: version = "~> 3.11"
            
            $ terraform --version
              Terraform v0.12.24
              + provider.aws v3.11.0   ---> the provider is now installed
              
          • Let's see what's in the create-vpc directory. Here, only *.tf files matter (click to see content)
          • $ tree
              .
              |-- outputs.tf        ---> displays resources detail after the deploy
              |-- variables.tf      ---> Resource variables needed for the deploy   
              |-- vpc.tf            ---> Our vpc terraform declartion 
            

          IV. Partial Deployment

            DEPLOY A SIMPLE VPC

              • Once the authentication configured (access_key_id/secrete set) , we can run terraform plan command to create an execution plan (quick dry run to check the desired state/actions).
                $ terraform plan
                   Refreshing Terraform state in-memory prior to plan... 
                  ------------------------------------------------------------------------
                  An execution plan has been generated and is shown below.
                    Terraform will perform the following actions:
                
                    # aws_internet_gateway.terra_igw will be created
                    + resource "aws_internet_gateway"  "terra_igw" 
                    {..}
                    # aws_route_table.terra_rt will be created
                    + resource "aws_route_table" "terra_rt" {
                    {..} 
                # aws_route_table_association.terra_rt_sub will be created + "aws_route_table_association" "terra_rt_sub"
                {..}
                # aws_security_group.terra_sg will be created
                + resource "aws_security_group" "terra_sg" {
                + arn                    = (known after apply)
                + description            = "SSH ,HTTP, and HTTPS"
                +
                egress                 =[{...}]
                + id = (known after apply)
                + ingress = [
                + {... rules for HTTP/SSH/HTTPS ingress access}
                # aws_subnet.terra_sub will be created
                + resource "aws_subnet" "terra_sub" {
                ...
                + cidr_block             = "192.168.10.0/24”
                ...}
                # aws_vpc.terra_vpc will be created
                + resource "aws_vpc" "terra_vpc" {
                ...
                + cidr_block             = "192.168.0.0/16”
                ...
                + tags                   = {
                        + "Name" = "Terravpc"         }     }
                Plan: 6 to add, 0 to change, 0 to destroy.
                - The output being too verbose I deliberately kept only relevant attributes for the VPC resource plan
              • Next, we can finally run terraform deploy to apply the changes required to create our VPC (listed in the plan)
              • $ terraform apply -auto-approve
                aws_vpc.terra_vpc: Creating...
                ...
                Apply complete! Resources: 6 added, 0 changed, 0 destroyed.
                
                Outputs:
                
                Subnet_CIDR = 192.168.10.0/24
                Subnet_Name = terrasub
                internet_gateway_Name = terra-igw
                map_public_ip_on_launch = true
                route_table_Name = terra-rt
                vpc_Name = Terravpc
                vpc_id = vpc-09d491059eb740562
                vpc_CIDR = 192.168.0.0/16
                vpc_dedicated_security_group_Name = terra-sg
                vpc_dedicated_security_ingress_rules =
                ["Inbound HTTP access :  80 , CIDR: 0.0.0.0/0",
                  "Inbound HTTPS access :  443 , CIDR: 0.0.0.0/0",
                  "Inbound RDP access :  3389 , CIDR: 0.0.0.0/0",
                  "Inbound SSH access:  22 , CIDR: 0.0.0.0/0",]

              Observations:

              - The deploy started by loading the resources variables in variables.tf which allowed the execution of vpc.tf
              - Finally terraform fetched the attributes of the created resources listed in outputs.tf

              Note: We’ll now destroy the vpc as the next instance deploy contains the same vpc specs.

                $ terraform destroy -auto-approve
                
                Destroy complete! Resources: 6 destroyed.


            V. Full deployment (Instance)

            1. OVERVIEW

              • Sweet, After our small test let's launch a full instance from scratch.
              • First we need to switch to the second directory terraform-provider-aws/launch-instance/
                Here's its content:
              • $ tree ./terraform-provider-aws/launch-instance
                .
                |-- cloud-init           ---> SubFolder
                |   `--> vm.cloud-config ---> script to config a webserver & add a HomePage
                |-- compute.tf    ---> Instance related terraform configuration
                |-- outputs.tf    ---> displays the resources detail at the end of the deploy
                |-- variables.tf  ---> Resource variables needed for the deploy   
                |-- vpc.tf        ---> same vpc terraform declaration deployed earlier
                

                Note: As you can see we have 2 additional files and one Subfolder. compute.tf is where the compute instance and all its attributes are declared. All the other .tf files come from my vpc example with some additions for variables.tf and output.tf

              • Cloud-init: is a cloud instance initialization method that executes tasks upon instance startup by providing the user_data entry of the aws_instance resource definition (See below).
                ...variable "user_data" { default = "./cloud-init/vm.cloud-config"} 
                $ vi compute.tf resource "aws_instance" "terra_inst" {
                ... user_data                    = filebase64(var.user_data)
                ...    
              • In my lab, I used cloud-init to install nginx and write an html page that will be the server's HomePage at Startup.
              • Make sure you your public ssh key is in your home directory or just modify the path below (see variables.tf)
              • resource "aws_key_pair" "terra_key" {

                   key_name   = var.key_name

                   public_key = file("~/id_rsa_aws.pub")  } ## Change me

            2. LAUNCH THE INSTANCE

              • Once in “launch-instance” directory, you can  run the plan command to validate the 10 resources required to launch the ec2 instance (end-state). The output has been truncated to reduce verbosity
              • $ terraform plan
                   Refreshing Terraform state in-memory prior to plan... 
                  ------------------------------------------------------------------------
                  An execution plan has been generated and is shown below.
                    Terraform will perform the following actions:
                
                  ... # VPC declaration (see previous vpc deploy 
                ...
                # aws_key_pair.terra_key will be created
                   + resource "aws_key_pair" "terra_key" {
                + key_name    = "demo_aws_KeyPair"
                      + key_pair_id = (known after apply)
                      + public_key  = "ssh-rsa AAAAB3Nz…"
                ...}
                # aws_ebs_volume.terra_vol[0] will be created
                  + resource "aws_ebs_volume" "terra_vol" {...}
                # aws_instance.terra_inst
                will be created + resource "aws_instance" "terra_inst" { + ... + ami                      = "ami-01861c2f0a2adfdb7"
                + availability_zone        = "us-east-1a"
                + instance_type            = "t2.micro"
                + key_name                 = "demo_aws_KeyPair"
                + private_ip              = "192.168.10.51"
                + tags                     = {
                     ----+ "Name" = "TerraCompute"
                        }
                + user_data                = "c8c701575f9c76db131ccf77cf352da"
                + ebs_block_device {
                + network_interface {
                + root_block_device {
                + ...
                + ...} # aws_volume_attachment.terra_vol_attach[0] will be created
                  + resource "aws_volume_attachment" "terra_vol_attach" {
                      + device_name = "/dev/xvdb"
                ...} ...
                  } Plan: 10 to add, 0 to change, 0 to destroy.
              • Let’s launch our CENTOS7  instance using terraform apply (I left a map of different OS ami’s in the variables.tf you can choose)
              • $ terraform apply -auto-approve
                ...
                aws_vpc.terra_vpc: Creating...
                aws_key_pair.terra_key: Creation complete after 0s [id=demo_aws_KeyPair]

                aws_security_group.terra_sg: Creation complete after 3s [id=sg-0b04564e8b] aws_instance.terra_inst: Still creating... [40s elapsed] aws_instance.terra_inst: Creation complete after 44s [id=i-046f1b1406bff]
                aws_ebs_volume.terra_vol[0]: Creation complete after 11s [id=vol-037c1a9f9]aws_volume_attachment.terra_vol_attach[0]: Creation complete after 21s [.. ... Apply complete! Resources: 10 added, 0 changed, 0 destroyed. Outputs: ...
                vpc_Name = Terravpc
                vpc_CIDR = 192.168.0.0/16
                Subnet_CIDR = 192.168.10.0/24
                SecurityGroup_ingress_rules = [
                  "Inbound HTTP access :  80 , CIDR: 0.0.0.0/0",
                  "Inbound HTTPS access :  443 , CIDR: 0.0.0.0/0",
                  "Inbound RDP access :  3389 , CIDR: 0.0.0.0/0",
                  "Inbound SSH access:  22 , CIDR: 0.0.0.0/0",
                ]
                SSH_Connection = ssh connection to instance TerraCompute ==> sudo ssh -i ~/id_rsa_aws centos@35.173.222.166 private_ip = "192.168.10.51" public_ip = "54.91.27.50"

                • Once the instance is provisioned, juts copy the public IP address(54.91.27.50) in your browser and Voila!
                • Here I just embedded a video link into the index page but you can adapt the cloud-init file to your own liking (with a new content in the write_file section.
                • You can also tear down this configuration by simply running terraform destroy from the same directory

                Tips

                • You can fetch any of the specified attributes in outputs.tf  using terraform output command i.e:  
                • $ terraform output SSH_Connection
                  ssh connection to instance TerraCompute ==> sudo ssh -i ~/id_rsa_aws centos@54.91.27.50
                • Terraform Console:
                  Although terraform is a declarative language, there are still myriads of functions you can use to process strings/number /lists/mappings etc. In my case I had to do some tests to get the right syntax for outputting the  ingress SG rules:
                • $ terraform console
                  > formatlist("%s: %s" ,aws_security_group.terra_sg.ingress[*].description,aws_security_group.terra_sg.ingress[*].to_port)
                  [ "Inbound HTTP access : 80", "Inbound HTTPS access : 443",
                  "Inbound SSH access: 22",]

                • There is an excellent all in one script with examples of most terraform functions >> here 


                Differences between OCI/AWS & things I wish AWS provider had

                • Unlike OCI, most of aws resources don’t have a display-name attribute, hence a tag is necessary each time you want to create a resource in AWS 
                • If you are used to DNS-labels for Subnet/VCNs in OCI, this is not something you’ll find in AWS
                • There is no direct way of setting the instance hostname like in OCI’s hostname_label attribute, you will have to do it via user-data
                • Bummer: I wish AWS had a data source for aws_key_pair as we can’t check if a key pair exists while launching an instance. This is a drawback for cases where a dev team needs to share a key. The only option is to give it a different keyname for each deployment even if the key is the same, which will generate a lot of unnecessary duplicates . 

                   CONCLUSION

                • We have demonstrated in this tutorial how to quickly deploy an instance using terraform in AWS and leverage Cloud-init to bootstrap an instance into a webserver.
                • Remember that all used attributes in this exercise can be modified in the variables.tf file.
                • Improvement: In my next blog post, I will look to improve the vpc.tf code to leverage for_each function on map collections to make security group rules creation dynamic and conditional.
                  stay tuned

            Thank you for reading!