Introduction:
If you want to learn more or contribute to the project please visit their official Wiki Page.
In addition I have inserted some relevent guidelines regarding Oracle 12c on RHEL 7 from RedHat’s website (Deploying Oracle RAC Database 12c on Red Hat Enterprise Linux 7 - Best Practices)
1. Setup VirtualBOX
2. Create the first node
3. Create shared ASM devices
- Configuring Device Mapper Multipathing
- Using udev Rules instead of Oracle ASMLib
4. Clone node
5. Install Grid Infrastructure 12c Release 1
6. Install Database Software 12c Release 1
7. Create Database
8. Enjoy and experiment
a. Hardware:
RAM : min 8 GB - actual 10 GB
DISK: min 50 GB - actual 500 GB
Internet connection
b. Software:

Oracle software - 1- Login to: http://edelivery.oracle.com/ with your Oracle Account
2- On the Media Pack Search page, select:
Product pack: Oracle Database Platform: Linux x86-64
3- Click GO then Select and download the following products :
Grid Infrastructure 12c Release 1 (12.1.0.2.0) and Oracle Database 12c Release 1 (12.1.0.2.0)

Disk space consumed for Oracle Grid Infrastructure Home and Oracle Database Home Enterprise Edition may vary.
Swap Space (Recommended) :
Filesystem layout to properly install the Oracle Grid Infrastructure and Oracle Database software
|
1. Setup VirtualBOX Go to Top
a. Network configuration : I have used the following network setup. Feel free to adjust to your needs:
- Hostnames london1,london2 Domaine: Evilcorp.com ( Mr Robot fan here…)
- Public IPs 192.168.78.0/24 (51,52)
- Interconnect 172.16.100.0/24 (51,52)
o Private IPs available from RAC nodes only
- SCAN
o Name => london-cluster-scan.evilcorp.com
o IPs => 192.168.78.251/252/253
b. Preparation:
1. From the main VBOX screen, choose File > Preferences > Network.
2. Double click on VirtualBox Host-Only Ethernet Adapter. Update the settings as shown and click Ok twice.
IPv4 Address: 192.168.78.1
IPv4 Network Mask: 255.255.255.0
3. Create a virtual hard drive now >
VDI (VirtualBox Disk Image)> Dynamically allocated> Location /London> size 30G
4. Disable USB
5. Allocate the minimum physical memory required ( 3.5G<Memory<4G )
o Storage: Delete the Empty disk under the IDE Controller
> Add CD/DVD Device
> Locate and open the rhel-server-7.1-x86_64- dvd.iso file.
o Network: Adapter 1: Host-only Adapter.
Adapter 2: Internal Network (Name: rac-priv) .
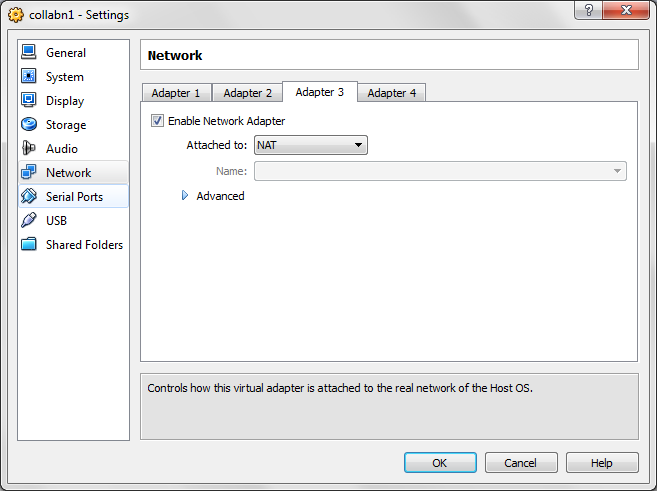
Adapter 3: NAT .


Shared folder 12gR2 : on shared folder link the diretory containing all the installation files and name it 12gR2
You can mount it later using the following command mount -t vboxsf 12gr2 /mnt
2. Create the first node Go to Top
1). Linux RedHat Enterprise installation :A. Click on Start to boot the virtual machine. If asked to select a start-up disk, choose RHEL7 iso.
o Skip the CD testing by pressing the right arrow key and press enter.
o From now on you can use the mouse to navigate. To unlock the mouse and keyboard from the VM, hit the right Ctrl or
Alt key.
Click Next.

B. Under LOCALIZATION
- Adapt or leave the timezone settings as they are and exit.
o KEYBOARD : Leave U.S. English selected and exit (unless you have another preferred keyboard layout).

C. Under INSTALLATION DESTINATION Leave Basic Storage Devices selected and exit.

In the hostname field, type london1.evilcorp.com .
D.1 Highlight EnpOs3 interface and click the Configure... button.
- Click the IPv4 Settings tab.
Click the Connect automatically checkbox. Click the Method: dropdown and select Manual. Click Add and type 192.168.78.51 for the address. Leave Netmask at 24. In the DNS servers: box, type 192.168.78.51, 192.168.78.52. In the Search domains: box, evilcorp.com then Click the Save .

D.2 Highlight EnpOs8 Interface and click the Configure... button.
Click the IPv4 Settings tab. Click the Connect automatically checkbox. Click the Method: dropdown and select Manual. Click Add and type 172.16.100.51. Change Netmask to 24. Click the Save button.

- Click the IPv4 Settings tab.
E. Under SOFTWARE SELECTIONClick the Connect automatically checkbox. Click the Method: dropdown and select Automatic (DHCP) addresses only. Click the Save button. Click Close to close the NETWORK & HOST NAME menu and click Next.
o Choose infrastructure Server: Select DNS Name Server and Compatibility Libraries Add-Ons then exit.

o Enter the Root Password as racattack (Click Use Anyway when warned about the weak password).
o Click Begin Installation
o When Installation is complete,Click Reboot.

2). Linux post installation configuration:
- We will first have to change the network interface naming from EnpOs3/8/9 to Eth0/1/2 through this *** Tutorial>>.
To connect to the new virtual machine, create a connection in Putty Called london1 with the IP Address of 192.168.78.51. Optionally, create another connection for london2 with the IP Address of 192.168.78.52 that will be created later as a clone of london1.

Open the london1 connection by clicking Open.
- Enter root at the login as: prompt and racattack at the password: prompt.
- Remove special character occuring when hitting backspace on the terminal
o Verify the network configuration via network manager user interface
o In case the hostname wasn't set durring the installation run the following
o Confirm host configuration
Static hostname: london1
Icon name: computer Chassis: n/a
Machine ID: dbd60b83d0d9470cbbf07397a6ab261e
Boot ID: 85bde258cf7b49458a397db3a7ae36a1
Virtualization: kvm
Operating System: Red Hat Enterprise Linux Server 7.1 (Maipo)
CPE OS Name: cpe:/o:redhat:enterprise_linux:7.1:GA:server
Kernel: Linux 3.10.0-229.el7.x86_64
Architecture: x86_64
- Shared memory allocation
*New in REDHAT 7: tmpfs is a file system that keeps all files and folders in the virtual memory of the operating system.
Here are some of the known purposes of tmpfs:
Filesystem Purpose
|
| /dev contains the special device files for all the devices. |
| /dev/shm contains shared memory allocation |
| /run used for system logs |
| /sys/fs/cgroup used for cgroups, a kernel feature to limit, police and account the resource usage of certain processes |
o Resize swap and dev/shm to 2G (shared memory allocation):
1- Setup the swapfile
[root@london1]# mkswap /swapfile
[root@london1]# chmod 0600 /swapfile
o Setting & Mounting Shared Memory File System on Linux (I actually assigned 3G )
o To enable it at boot time, edit /etc/fstab to include the following entry:
[..]
tmpfs /dev/shm tmpfs size=3g 0 0
/swapfile swap swap defaults 0 0
o Check the new swap size
- OS Configuration
Install Required Linux Packages for Oracle Grid Infrastructure and Oracle Database 12.1.0.2 :
------------------------------------------------------------
binutils
libX11
compat-libcap1
libXau
compat-libstdc++-33
libaio
gcc
libaio-devel
gcc-c++
libdmx
glibc-devel
glibc
ksh
make
libgcc
sysstat
libstdc++
xorg-x11-utils
libstdc++-devel
xorg-x11-xauth
libXext
libXv
libXtst
libXi
libxcb
libXt
libXmu
libXxf86misc
libXxf86dga
LibXxf86vm
nfs-utils
o Add a local DVD repository
[root@london1]# vi /etc/yum.repos.d/rhel71.repo
[rhe64]
name=Red hat Linux 7.1 x86_64
baseurl=file:///media
gpgcheck=0
enabled=1
Add Virtual Box guest addition plugin
- Note: Due to some headers mismatch check and possible execution errors, few rpms may need to be installed first :
[root@london1]# umount /media
- Make the VirtualBox guest additions available to the OS by clicking Devices>Install Guest Additions
o Run the below commands
[root@london1]# sh /media/VBoxLinuxAdditions.run
[root@london1]# umount /media
Note : Some of the Install Guide requirements will already be present from the "default-RPMs" foundation of Linux that you started with (including gcc’s installed above) . The rest is located in the DVD except the compat_libstdc++-33.
- compat-libstdc++-33-3.2.3-72.el7.x86_64 needs to be downloaded from redhat repository (30 days trial) or can be found as Oracle linux equivalent on https://yum.oracle.com/repo/OracleLinux/OL7 or rpm.pbone.net
- Make the linux RHEL7 DVD available to the OS
- Run the below commands to install the required rpms
[root@london1]# yum install binutils compat-libcap1 compat-libstdc++-33 elfutils-libelf elfutils-libelf-devel gcc gcc-++ glibc glibc-common glibc-devel glibc-headers ksh libaio libaio-devel libgcc libstdc++ libstdc++-devel make numactl-devel sysstat unixODBC unixODBC-devel libXxf86vm cpp libdmx mpfr kernel-headers xorg-x11-utils libXmu xorg-x11-xauth libXt libXv libXxf86dga nfs-utils
[root@london1]# rpm -ivh compat-libstdc++-33-3.2.3-72.el7.x86_64
o Additional rpms for other tools (i.e VNC)face
.. warning... No package xorg-x11-twm available
o Note: The reason behind the non-availability of xorg-x11-twm package is because it has been discontinued in RHEL 7 and replaced by metacity.
Solution : Install the below packages :
o Next , just download and install xorg-x11-twm from your favorite CentOS 6 mirror
o For maximum flexibility you can add the following CentOS 7 packages
o Finally, verify that all the rpms are installed by typing the below rpm commands
[root@london1]# rpm -vq cloog-ppl libXxf86misc ppl binutils compat-libcap1 compat-libstdc++-33 elfutils-libelf elfutils-libelf-devel gcc gcc-c++ glibc glibc-common glibc-devel glibc-headers ksh libaio libaio-devel libgcc libstdc++ libstdc++-devel make numactl-devel sysstat unixODBC unixODBC-devel libXxf86vm cpp libdmx mpfr kernel-headers xorg-x11-utils libXmu xorg-x11-xauth libXt libXv libXxf86dga nfs-utils
-- VNC rpms
[root@london1]# rpm -vq xorg-x11-xinit xorg-x11-font-utils xorg-x11-fonts-Type1 libX11-common xorg-x11-xauth libX11 dbus-x11 xorg-x11-server-utils xorg-x11-xkb-utils tigervnc-server xterm
o System parameter change : Here is the list of system parameters to be adapted :
Virtual Memory: Shared Memory (SHMMAX, SHMALL, SHMMNI) Semaphores (SEMMSL, SEMMNI, SEMMNS) Ephemeral Network Ports Optimizing Network Settings Setting NOZEROCONF Increasing synchronous I/O Requests Increasing File Handles Kernel Panic On OOPS Parameter Disabling the avahidaemon service (N/A)
Note: Prior to making any changes to the /etc/sysctl.conf, create a backup as follows:
o Adapt the content of sysctl.conf with the bellow lines if they are different or not present.
net.ipv4.ip_forward = 0
net.ipv4.conf.default.rp_filter = 1
net.ipv4.conf.default.accept_source_route = 0
net.core.rmem_default = 262144
net.core.rmem_max = 4194304
net.core.wmem_default = 262144
net.core.wmem_max = 1048576
kernel.sysrq = 0
kernel.core_uses_pid = 1
net.ipv4.tcp_syncookies = 1
net.bridge.bridge-nf-call-ip6tables = 0
net.bridge.bridge-nf-call-iptables = 0
net.bridge.bridge-nf-call-arptables = 0
vm.swappiness = 0
vm.dirty_background_ratio = 3
vm.dirty_ratio = 80
vm.dirty_expire_centisecs = 500
vm.dirty_writeback_centisecs = 100
kernel.msgmnb = 65536
kernel.msgmax = 65536
kernel.shmmax = 68719476736
kernel.shmmni = 4096
kernel.shmall = 4294967296
kernel.sem = 250 32000 100 128
fs.aio-max-nr = 1048576
fs.file-max = 6815744
net.ipv4.ip_local_port_range = 9000 65500
o For the changes to take effect immediately, run the following command
o Set NOZEROCONF on /etc/sysconfig/network file
Modify this line to ensures that the route 169.254.0.0/16 is not added to the routing table. If the file is empty skip this stepce
NOZEROCONF=yes
o Disable SElinux
SELinux can prevent to establish a correct SSH communication between two hosts, or prevent the creation of ASM disks with the oracleasm tool.To disable SELinux, Edit the file /etc/selinux/config as follow:
--- Line to modify —>… SELINUX=disabled
--- Reboot the machine and confirm SELINUX is disabled
[root@london1 ~]# getenforce
Disabled
o Disable the avahidaemon service if loaded:
[root@london1]# systemctl stop avahi-daemon
[root@london1]# systemctl disable avahi-dnsconfd
[root@london1]# systemctl disable avahi-daemon
o Turn off and disable the Firewall:
If the firewall option is operating, you will need to first manually disable UDP ICMP rejections
*Note: RHEL 7 introduced firewalld in replacement of iptables which makes /etc/sysconfig/iptables no longer relevant.
o Turn UDP ICMP rejections off for all subsequent server reboots (which should always be turned off).
[root@london1]# rm '/etc/systemd/system/dbus-org.fedoraproject.FirewallD1.service'
[root@london1]# rm '/etc/systemd/system/basic.target.wants/firewalld.service'
[root@london1]# systemctl status firewalld
o Add Users and groups
[root@london1]# groupadd --gid 502 dba
[root@london1]# groupadd --gid 503 asmdba
[root@london1]# groupadd --gid 504 asmoper
[root@london1]# groupadd --gid 505 asmadmin
[root@london1]# groupadd --gid 506 oper
Note : vboxsf group allows access to the shared folders
[root@london1]#passwd oracle
Type : racattack
[root@london1]#useradd --uid 502 --gid oinstall --groups dba,asmadmin,asmdba,asmoper,vboxsf -d /home/grid -s /bin/bash -c "Grid Software Owner" grid
[root@london1]#passwd grid
Type : racattack
o Setting Shell Limits for the Grid and Oracle Users
## add following hard soft limits
oracle soft nproc 2047
oracle hard nproc 16384
oracle soft nofile 1024
oracle hard nofile 65536
oracle soft stack 10240
oracle hard stack 32768
grid soft nproc 2047
grid hard nproc 16384
grid soft nofile 1024
grid hard nofile 65536
grid soft stack 10240
grid hard stack 32768
- Or : Alternatively,you can update the resource limits in the /etc/security/limits.conf configuration file for the Oracle installation owner by adding the following lines.
## oracle user limits add the following
oracle soft nproc 2047
oracle hard nproc 16384
oracle soft nofile 1024
oracle hard nofile 65536
oracle soft stack 10240
oracle hard stack 32768
o As the root, create a shell script labeled oracle-grid.sh within /etc/profile.d/ to create the appropriate ulimits
for the oracle and grid user .
# Setting the appropriate ulimits for oracle and grid user
if [ $USER = "oracle" ]; then
if [ $SHELL = "/bin/ksh" ]; then
ulimit -u 16384
ulimit -n 65536
else
ulimit -u 16384 -n 65536
fi
fi
if [ $USER = "grid" ]; then
if [ $SHELL = "/bin/ksh" ]; then
ulimit -u 16384
ulimit -n 65536
else
ulimit -u 16384 -n 65536
fi
fi
o Add the following lines to the /etc/pam.d/login file to use limits, if it does not already exist.
session required pam_limits.so
*Note : If you want to reference /lib/security as default library directory create the folder and run the following
o Add two modified .bash_profile to /home/oracle & /home/grid directories respectively
“.bash_oracle_profile” and “.bash_grid_profile”
(rename each of them to .bash_profile and assign a value to ORACLE_SID accordingly )
o Enable ssh: Run as oracle /and grid
[grid@london1]# cat /home/grid/.ssh/id_rsa.pub >>/home/grid/.ssh/authorized_keys
o Create Grid oracle Directories
o Create Oracle inventory Directory
[oracle/Grid@london1]# mkdir -p /u01/app/OraIventory
[oracle/Grid@london1]# chown -R grid:oinstall /u01/app/OraIventory
[root@london1]# chmod -R 775 /u01/app/OraIventory
- Create Grid Infrastrcuture Home directory and Oracle base
[root@london1]# mkdir –p /u01/grid/oracle/product/12.1.0.2/grid
[root@london1]# chown -R grid:oinstall /u01/grid
[root@london1]# chmod -R 775 /u01/grid
[root@london1]# mkdir –p /u01/app/grid ----- Oracle BASE
[root@london1]# chown -R grid:oinstall /u01/app/grid [root@london1]# chmod -R 775 /u01/app/grid
- Create database Oracle Base Directory
[root@london1]# mkdir -p /u01/app/oracle [root@london1]# mkdir -p /u01/app/oracle/cfgtoollogs
- Needed to ensure dbca will be able to launch after rdbms install
[root@london1]# chmod -R 775 /u01/app/oracle/cfgtoollogs/ [root@london1]# chown -R oracle:oinstall /u01/app/oracle [root@london1]# chmod -R 775 /u01/app/oracle
- Create Oracle RDBMS Home directory [root@london1] # mkdir -p /u01/app/oracle/product/12.1.0.2/db_1 [root@london1]# chown -R oracle:oinstall /u01/app/oracle/product/12.1.0.2/ [root@london1]# chmod -R 775 /u01/app/oracle
o Setup oracle root profiles
[root@london1]# chown oracle:dba /etc/oratab
o Add following lines to /root/.bashrc
. oraenv >/dev/null
unset ORAENV_ASK
3). RAC DNS configuration
[root@london1 ~]# touch /var/named/evilcorp.com
[root@london1 ~]# chmod 664 /var/named/evilcorp.com
[root@london1 ~]# chgrp named /var/named/evilcorp.com
[root@london1 ~]# chmod g+w /var/named/evilcorp.com.rev
--------------Create Reverse zone--------------
[root@london1 ~]# touch /var/named/evilcorp.com.rev
[root@london1 ~]# chmod 664 /var/named/evilcorp.com.rev
[root@london1 ~]# chgrp named /var/named/evilcorp.com.rev
[root@london1 ~]# chmod g+w /var/named/evilcorp.com.rev
[root@london1 ~]# chmod g+w /var/named
[root@london1 ~]# cp /etc/named.conf /etc/named.conf.org
o Edit named.conf : empty-zones-enable no; within options setion will allow one reverse zone for all networks
[root@london1 ~]# sed -i -e 's/listen-on .*/listen-on port 53 { 192.168.78.51; };/' \-e 's/allow-query .*/allow-query { 192.168.78.0\/24; localhost; };\n allow-transfer { 192.168.78.0\/24; };/' \-e 's/session.key";/session.key"; \n empty-zones-enable no;\n/;' \-e '$azone "evilcorp.com" {\n type master;\n file "evilcorp.com";\n};\n\nzone "in-addr.arpa" {\n type master;\n file "evilcorp.com.rev";\n};' /etc/named.conf
o Edit forward zone (evilcorp.com)
@ IN SOA london1 hostmaster (
101 ; serial
1D ; refresh
1H ; retry
1W ; expire
3H ) ; minimum
NS london1
NS london2
localhost A 127.0.0.1
london1 A 192.168.78.51
london1-vip A 192.168.78.61
london1-priv A 172.16.100.51
london2 A 192.168.78.52
london2-vip A 192.168.78.62
london2-priv A 172.16.100.52
london-cluster-scan A 192.168.78.251
london-cluster-scan A 192.168.78.252
london-cluster-scan A 192.168.78.253' >/var/named/evilcorp.com
o Edit reverse Zone (evilcorp.com.rev)
@ IN SOA london1.evilcorp.com. hostmaster.evilcorp.com(
101 ; serial
1D ; refresh
1H ; retry
1W ; expire
3H ) ; minimum
NS london1.evilcorp.com.
NS london2.evilcorp.com.
51.78.168.192 PTR london1.evilcorp.com.
61.78.168.192 PTR london1-vip.evilcorp.com.
51.100.16.172 PTR london1-priv.evilcorp.com.
52.78.168.192 PTR london2.evilcorp.com.
62.78.168.192 PTR london2-vip.evilcorp.com.
52.100.16.172 PTR london2-priv.evilcorp.com.
251.78.168.192 PTR london-cluster-scan.evilcorp.com.
252.78.168.192 PTR london-cluster-scan.evilcorp.com.
253.78.168.192 PTR london-cluster-scan.evilcorp.com.' > /var/named/evilcorp.com.rev
o Generate the rndc.key file. alternative to writing the rndc.conf file ( automatic rndc configuration)
[root@london1]# chmod g+r /etc/rndc.key
o Restart named service and Enable at boot
[root@london1]# chkconfig named on
*Note: Forwarding requires to add named.service simlink to run 'systemctl enable named.service'.
o Finally check if the DNS configuration is well set
--verify if parameter PEERDNS is set to no to prevent the resolv.conf from being overwritten by the dhcp client:
verify zone PEERDNS=no
# Generated by NetworkManager
search evilcorp.com nameserver 192.168.78.51 nameserver 192.168.78.52
// verify zone OK
tcp 0 0 192.168.78.51:53 0.0.0.0:* LISTEN 491/named
tcp 0 0 127.0.0.1:953 0.0.0.0:* LISTEN 491/named udp 0 0 192.168.78.51:53 0.0.0.0:* 491/named
london1.evilcorp.com has address 192.168.78.51
3. Create shared ASM devices Go to Top
Create and attach vm disks
o Execute the following command to create 5 disks for ASM (+DATA diskgroup will use 3 ). Each command is in a single line.C:> "C:\Program Files\Oracle\VirtualBox\VBoxManage" createhd --filename "C:\VM\RAC lab\london1\asm2.vdi" --size 4096 --format VDI --variant Fixed
C:> "C:\Program Files\Oracle\VirtualBox\VBoxManage" createhd --filename "C:\VM\RAC lab\london1\asm3.vdi" --size 4096 --format VDI --variant Fixed
C:> "C:\Program Files\Oracle\VirtualBox\VBoxManage" createhd --filename "C:\VM\RAC lab\london1\asm4.vdi" --size 4096 --format VDI --variant Fixed
C:> "C:\Program Files\Oracle\VirtualBox\VBoxManage" createhd --filename "C:\VM\RAC lab\london1\asm5.vdi" --size 4096 --format VDI --variant Fixed
0%...10%...20%...30%...40%...50%...60%...70%...80%...90%...100% Medium created. UUID: 02a719b5-decf-4c16-9513-632c81e86896
through GUI if necessary)
C:> "C:\Program Files\Oracle\VirtualBox\VBoxManage" storageattach london1 --storagectl "SATA" --port 2 --device 0 --type hdd --medium "C:\VM\RAC lab\london1\asm2.vdi" --mtype shareable
C:> "C:\Program Files\Oracle\VirtualBox\VBoxManage" storageattach london1 --storagectl "SATA" --port 3 --device 0 --type hdd --medium "C:\VM\RAC lab\london1\asm3.vdi" --mtype shareable
C:> "C:\Program Files\Oracle\VirtualBox\VBoxManage" storageattach london1 --storagectl "SATA" --port 4 --device 0 --type hdd --medium "C:\VM\RAC lab\london1\asm4.vdi" --mtype shareable
C:> "C:\Program Files\Oracle\VirtualBox\VBoxManage" storageattach london1 --storagectl "SATA" --port 5 --device 0 --type hdd --medium "C:\VM\RAC lab\london1\asm5.vdi" --mtype shareable
o Create partition from above added disks
[root@london1 ~]# fidsk /dev/sdb
Command (m for help): n
Command action e extended / p primary partition (1-4) p
Partition number (1-4): 1
First cylinder (1-652, default 1): <enter>
Using default value 1
Last cylinder, +cylinders or +size{K,M,G} (1-xxx, default xxx): <enter>
Command (m for help): w
The partition table has been altered!
--- Final result
[root@london1 ~]# ls -l /dev/sd?1
brw-rw---- 1 root disk 8, 1 Jul 19 05:34 /dev/sda1
brw-rw---- 1 root disk 8, 17 Jul 19 05:52 /dev/sdb1
brw-rw---- 1 root disk 8, 33 Jul 19 05:53 /dev/sdc1
brw-rw---- 1 root disk 8, 49 Jul 19 05:54 /dev/sdd1
brw-rw---- 1 root disk 8, 65 Jul 19 05:54 /dev/sde1
brw-rw---- 1 root disk 8, 65 Jul 19 05:54 /dev/sdf1
o Configure the option -g for the scsi_id command to expect an UUID from the shared devices.
----- Create a symbolic link for scsi_id
ln -s '/usr/lib/udev/scsi_id' '/sbin/scsi_id'
o Prepare the file /etc/udev/rules.d/99-oracle-asmdevices.rules by running the following script:
cmd="/sbin/scsi_id -g -u -d"
for disk in sdb sdc sdd sde ; do
cat <<EOF >> /etc/udev/rules.d/99-oracle-asmdevices.rules KERNEL=="sd?1", SUBSYSTEM=="block", PROGRAM=="$cmd /dev/\$parent", \
RESULT=="`$cmd /dev/$disk`", SYMLINK+="asm-disk$i", OWNER="grid", GROUP="dba", MODE="0660"
EOF
i=$(($i+1))
done
- Note: Choose carefully the owner of the asm disks here (OWNER=grid if the installation uses grid user and OWNER=oracle if installation will be done through oracle user).
The file content should look like the below:
[root@london1]# /sbin/udevadm test /block/sdb/sdb1
[root@london1]# /sbin/udevadm test /block/sdc/sdc1
[root@london1]# /sbin/udevadm test /block/sdd/sdd1
[root@london1]# /sbin/udevadm test /block/sde/sde1
[root@london1]# /sbin/udevadm test /block/sde/sdf1
[root@london1]# /sbin/udevadm control --reload-rules
[root@london1]# /sbin/start_udev ** Not needed for RHEL
o Check the result
brw-rw---- 1 grid dba 8, 17 Jul 19 07:28 /dev/asm-disk1
brw-rw---- 1 grid dba 8, 33 Jul 19 07:28 /dev/asm-disk2
brw-rw---- 1 grid dba 8, 49 Jul 19 07:28 /dev/asm-disk3
brw-rw---- 1 grid dba 8, 65 Jul 19 07:28 /dev/asm-disk4
brw-rw---- 1 grid dba 8, 65 Jul 19 07:28 /dev/asm-disk5
4. Clone the node Go to Top
Copy london1 VBOX hdrive rename it to london2 and start a new vm with a name london2 using existing london2.vdi.
- Add virtual machine network configuration as
- Adapter 1 (host only).
- Adapt2 : internal network rac-priv.
- Adapter3 (NAT).
- Add shared file 12rc_RAC
- Attach 4 previous ASM disks
o Startup london2 node and run the network manager tool
- eth0 public IP to 192.168.78.52
- eth1 Private IP to 172.16.100.52
- eth2 DHCP address only
- Configure new device> dns configuration
- Use london2.evilcorp.com as hostname
o Remove the udev network rules file. It will be regenerated on the next reboot
with the new MAC addresses.
o Remove the HWADDR and UUID lines in the network adapter configuration files.
o Complete DNS setup
[root@london2]# service named stop
------ Remove the actual DNS files
[root@london2]# rm -f /var/named/evilcorp.com /var/named/evilcorp.com.rev
----- Modify /etc/named.conf file
[root@london2]# sed -i -e 's/listen-on .*/listen-on port 53 { 192.168.78.52; };/' \-e 's/type master;/type slave;\n masters {192.168.78.51; };/' \/etc/named.conf
--- Check that the parameter PEERDNS is set to no in /etc/sysconfig/network-scripts/ifcfg-eth2---- start the DNS service
[root@london2]# service named start
[root@london2 ~]# dig @london1 london1.evilcorp.com
[root@london2 ~]# dig @london1 london2.evilcorp.com
[root@london2 ~]# dig @london1 london1-vip.evilcorp.com
[root@london2 ~]# dig @london1 london2-vip.evilcorp.com
[root@london2 ~]# dig @london1 london1-priv.evilcorp.com
[root@london2 ~]# dig @london1 london2-priv.evilcorp.com
[root@london2 ~]# dig @london1 london-cluster-scan.evilcorp.com
[root@london2 ~]# dig @london2 london1.evilcorp.com
[root@london2 ~]# dig @london2 london2.evilcorp.com
[root@london2 ~]# dig @london2 london1-vip.evilcorp.com
[root@london2 ~]# dig @london2 london2-vip.evilcorp.com
[root@london2 ~]# dig @london2 london1-priv.evilcorp.com
[root@london2 ~]# dig @london2 london2-priv.evilcorp.com
[root@london2 ~]# dig @london2 london-cluster-scan.evilcorp.co
o Confirm that the asm disk are present on node london2
o Setup the VNC Server on london1 and unzip the installation files
-- Desktop is london1.evilcorp.com:1
[oracle@london1]$ unzip V46096-01_1of2.zip -d {/path/to/extract}
[oracle@london1]$ unzip V46096-01_2of2.zip -d {/path/to/extract}
Do the same with Oracle Database files : V46095-01_1of2.zip V46095-01_2of2.zip
o Use the following command to install the cvuqdisk package on both nodes (this allows Cluster Verification Utility to find the shared disks during installation)
o Adjust the cvu_config to avoid the pdksh "missing package" pre-req failure
5. Install grid infrastructure 12c release 1 Go to Top
o Run Grid Cluster installer


- If the Candidate Disks list is empty


[root@]$ /u01/app/grid/product/12.1.0.2/grid/root.sh
[root@]$ /u01/app/grid/product/12.1.0.2/grid/crs/config/rootconfig.sh

- This will change the two following lines
Post-Installation
o Execute configToolAllCommands as grid user on first node:
6. Install the database software 12c release 1 Go to Top
o INSTALL the DBMS software


installation


Warning : SWAP too small+ /dev/shm not permanently mounted
7. Create the 12c database on the cluster Go to Top
o Create +FRA asm diskgroup first
[+ASM1]
[grid@london1] sqlplus "/ as sysasm"
SQL> CREATE DISKGROUP FRA EXTERNAL REDUNDANCY DISK '/dev/sde1','/dev/sdf1' ;
SQL> Alter diskgroup FRA mount;
o Run the DBCA:


Click NEXT

Click Finish to start the installation

The use of Automatic Memory Management (AMM) is absolutely incompatible with HugePages.
3- Reboot the system to ensure the huge pages setting takes effect properly.
[root@]# cat /sys/kernel/mm/transparent_hugepage/enabled
[always] madvise never
oracle-rwxrwsr-x 1 oracle dba 323649880 Dec 22 02:53 oracle
[root@london1 bin]# chmod 6775 oracle
-- first number in this command (6) means setting both setuid/suid and setgid/sgid options
[root@london1 bin]# ls -l
oracle-rwsrwsr-x 1 oracle dba 323649880 Dec 22 02:53 oracle
7. Enjoy and experiment Go to Top
--------------------------------------------------------------------------------
Name Target State Server State details
--------------------------------------------------------------------------------
Cluster Resources
--------------------------------------------------------------------------------
ora.rac_db.db
1 ONLINE ONLINE london1 Open,STABLE
2 ONLINE ONLINE london2 Open,STABLE
--------------------------------------------------------------------------------
# [root@london2 bin]# srvctl status database -d Rac_DB
Instance RACDB1 is running on node london1
Instance RACDB2 is running on node london2
For a better preview of the RAC 12c features I invite you to explore it in my next post >> Enjoy and experiment